Indoor Composting with the Reencle Gravity Series: Full Review + Setup Guide
Our First Step Toward a More Regenerative Cottage Life
When we started dreaming up our off-grid garden cottage in the Catskills, composting rose to the top of our must-have list. We wanted to grow lush wildflowers, nourishing produce, and healing herbs — for ourselves, for our events and offerings, and for the land itself. And healthy, living soil starts with good compost.
But finding the right indoor composter? Much trickier than expected. Especially if you’re looking for real compost — not just dried food pellets you toss in the trash. That’s why I created a full YouTube video walking through the unboxing and setup of the Reencle Gravity Series, one of the newer electric composters on the market. And in this post, I’m sharing what we’ve learned — so you can decide if indoor composting is right for your home or homestead.
Why We Chose an Indoor Composter
Although we’re lucky to have over 5 acres of forest and meadow, we skipped a traditional outdoor compost pile for two key reasons:

Critters
Our forest neighbors include birds, bunnies, groundhogs, mice, deer, and even the occasional bear. We didn’t want to encourage late-night visitors with food scraps.

Travel
Because we’re not on the land full-time (yet!), keeping a traditional compost pile balanced and active didn’t feel sustainable. So we started researching indoor composters — and eventually landed on a system that’s easy to use, compact, and actually creates usable compost.

Why the Reencle Gravity Series?
After comparing several electric composters, the Reencle Gravity stood out for a few reasons:
It’s whisper-quiet — perfect for our peaceful cottage kitchen
It makes real compost, not just dehydrated waste
Compact size fits easily in small kitchens or apartments
Starter kit included: compost pellets + booster powder to jumpstart the process
Color options: we chose white to match our cottage aesthetic, but it also comes in charcoal gray
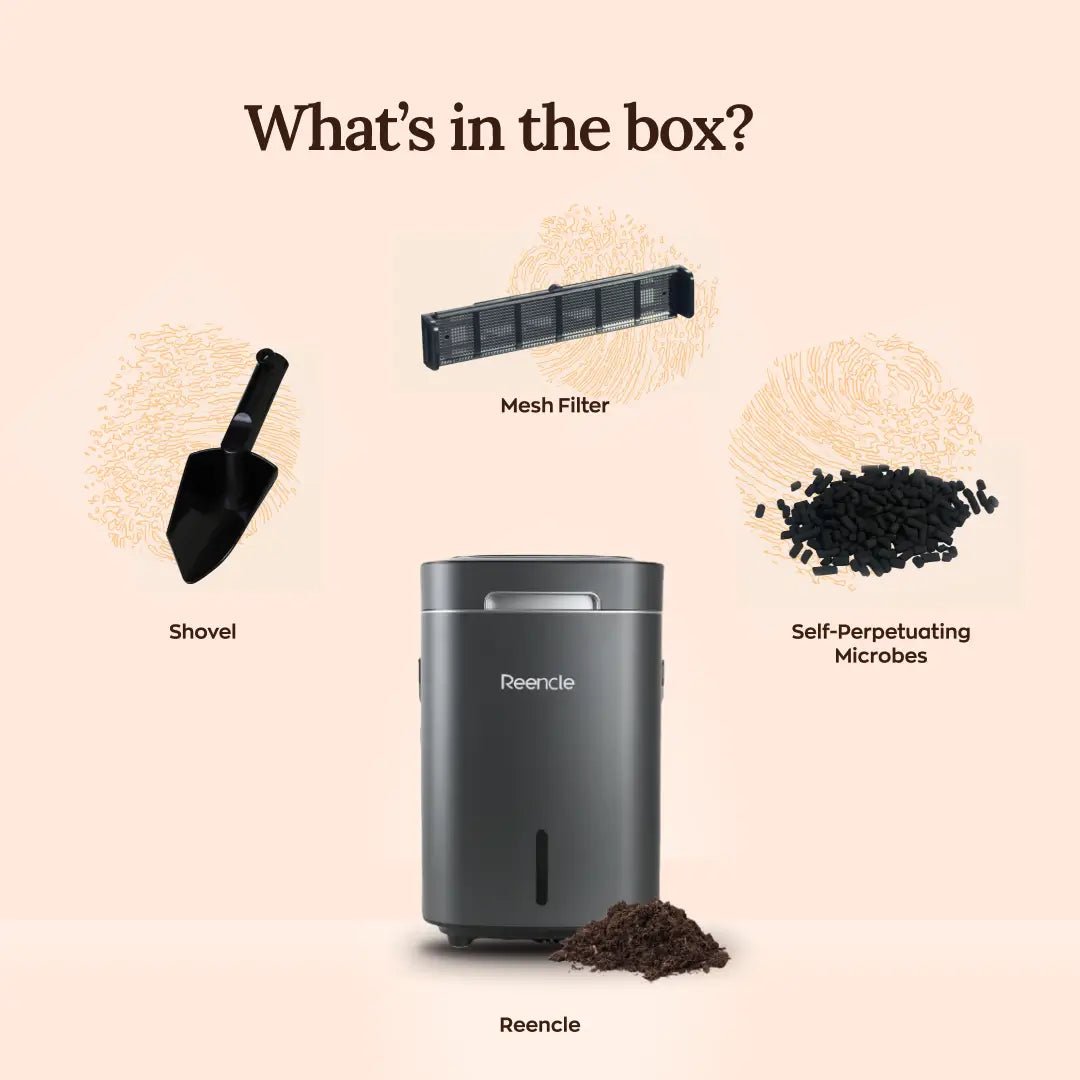
What’s in the Box
Unboxing and setup were super straightforward. Inside, we found:
Compost starter pellets
Compost booster powder
Multiple scoops and sifters
A filter + power adapter
A printed quick-start guide with clear instructions
If you’re the type who loves an organized, stress-free setup (me too!), this part will make you very happy.
How to Set It Up (Step-by-Step)
Setting up the Reencle took about 10 minutes. Here’s the process:
Pour the compost starter into the main chamber
Add the compost booster powder
Pour in 1.8 liters of clean water
Close the lid, plug it in, and press the power button
Let it run for 3–6 hours to activate the system
Start adding your food scraps!
Watch the full visual guide on YouTube:
What Can (and Can’t) Go In?
The Reencle handles a wider range of food scraps than many electric models:
✅ Compostable:

Fruit + veggie scraps
Cooked grains, rice, and bread
Coffee grounds + filters
Cheese + eggshells
Dead flowers, wilted greens, and small food scraps
❌ Avoid:
Bones + shells
Hard fruit pits
Produce stickers
Anything plastic, rubber, or synthetic
This makes it a great fit for everyday kitchen use — whether you’re cooking fresh meals or brewing herbal infusions.
How We’re Using the Compost: From Garden Beds to Native Plants

The very beginnings of our small garden… Stay tuned on YouTube to see the transformation!
Our first batches of compost will go straight into the raised beds and grow bags behind our cottage, where we’re growing herbs, vegetables, and pollinator-friendly plants for teas, tinctures, and seasonal meals.
Next, we’ll be using it to amend the topsoil we’re adding in front of the house as part of our rain garden and sidewalk projects.
This is especially important because our land has heavy clay soil — common in much of the Northeast — which tends to be dense, compacted, and slow to drain. That’s not ideal for young roots or delicate herbs.
Adding compost to garden soil helps by:
Improving drainage while still retaining moisture (perfect for herbs + pollinator plants)
Loosening compacted soil, making it easier for roots to grow deep and strong
Feeding beneficial microbes that boost soil health naturally
Increasing aeration, so oxygen can reach plant roots
Balancing pH and nutrient availability, especially for clay-heavy soils
With regular composting, we’re building rich, living soil that will support everything from wildflowers and kitchen herbs to future food forest plantings and native plant restoration.
Eventually, we hope to use compost throughout the property — in our rain gardens and hedges, in our “secret garden” by our tiny house, and around our fruit trees and berry bushes— to support long-term ecosystem regeneration.
First Impressions (1 Week In)
We’re loving it so far.
It’s whisper-quiet
It blends into the kitchen beautifully
The startup process was seamless
And we’ve already started collecting eggshells, peels, and coffee grounds for our first batch
The built-in paddles keep things turning smoothly, and the guide includes smart troubleshooting tips if needed.

What We Use to Collect Scraps During the Day
One of the things we love about the Reencle is that you don’t need a separate bin for daily scraps. You can easily tap open the lid and add even the tiniest piece of food waste at any time — no need to wait for a “full load.”
That said, when we’re cooking a big meal, we usually toss peels, stems, and scraps into a small mixing bowl on the counter. Once we're done chopping and prepping, we dump it all in at once to save time (and steps across the kitchen).
No smell, no mess, no extra compost bin needed.

What’s Next: Turning Scraps Into Soil
In a few weeks, we’ll be testing our first batch of finished compost in the garden beds and wildflower patches. We’ll also share a follow-up video showing the results — and how we’re using this compost to enrich our soil and grow herbs for teas, tinctures, and more.
Whether you’re in a tiny city apartment or a growing homestead, indoor composting can be a beautiful way to close the loop and nourish the earth — right from your kitchen counter.
Want to see the setup in action? Watch the full unboxing + setup on YouTube
Heads up :) This post contains affiliate links, which means I may earn a small commission if you decide to purchase through them — at no extra cost to you. I only share products I’ve personally used and loved (like this one!) Thank you for helping support our mission here at Ivy + Light!